An ammeter is a meter used to measure current in AC and DC circuits. In the circuit diagram, the symbol of the ammeter is "Circle A". The current value is in "A" or "A" as the standard unit. This article mainly introduces the use of ammeter and the use of the clamp-type ammeter and the diagram, together to understand.
Ammeter usageRules for the use of ammeters:
1. The ammeter should be connected in series in the circuit (otherwise short circuit);
2, the current should be from the "+" terminal, from the "-" terminal (otherwise the pointer is reversed);
3. The measured current should not exceed the range of the ammeter (you can use the method of test touch to see if the range is exceeded.);
4. It is absolutely not allowed to connect the ammeter to the two poles of the power supply without passing through the electric appliance (the current resistance inside the ammeter is very small, equivalent to one wire. If the ammeter is connected to the two poles of the power supply, the pointer is snoring and the burning is heavy. Bad current meter, power supply, wire.).
Ammeter reading:
1, see the range
2, see the division value (generally, the range 0~3A graduation value is 0.1A, 0~0.6A is 0.02A)
3, see the needle position (must be observed from the front)
Preparation of the ammeter before use:
1. Zero the school and adjust the zero button with a flat-mouth screwdriver.
2, select the range {experience or use the trial method}.
How to use ammeter
1, pick up the form
The ammeter must be connected in series with the circuit under test to allow current to flow from the "+" terminal of the ammeter and out of the "-" terminal. When using an ammeter, its two terminals must not be directly connected to the two poles of the power supply, otherwise the ammeter will be burnt out due to excessive current.
2, select the range of the table
The ammeter has three terminals, as shown in the figure above. If the ammeter is connected to the two posts "+" and "0.6", the range is 0.6A, and the lower set of values ​​on the dial are read; if it is connected to "+" and On the two terminals of "3", the range is 3A, and the set of values ​​above the dial is read. Before the experiment, if you do not know how to connect, you can first estimate the current value in the circuit. If the estimated current is less than 0.6A, the range should be selected. If the estimated current is greater than 0.6A but less than 3A, the range should be selected. If it can not be estimated, it can be carried out by means of test (fixing one terminal, using the other end of the circuit to quickly touch the maximum range of the terminal), and then selecting the appropriate range according to the angle of deflection of the ammeter pointer.
3, test circuit
After the physical map is connected according to the circuit diagram, the test connection must be made. Carefully observe the deflection of the ammeter pointer. If the pointer is not deflected, it means that the circuit is disconnected somewhere; if the pointer is deflected in the opposite direction, the positive and negative terminals of the watch are reversed; if the angle of the pointer is too large, Note that the range is selected too small; if the angle of the pointer deflection is too small, the range is too large. Then, according to the situation observed during the test, the corresponding adjustments are made before the relevant experiments are carried out.

How to use the clamp type ammeter
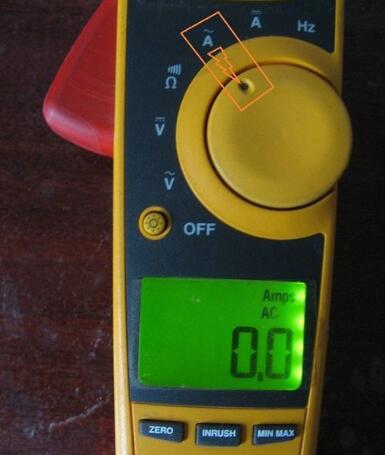
1. Select the gear position of the clamp meter correctly, as shown in the figure, select the AC AC current file.
2. Open the clamp-type table jaw and connect the clamp meter to the circuit under test.
The access method shown in the figure below is wrong, so that the current consumption of the circuit cannot be measured, but the leakage current of the circuit is normally zero.

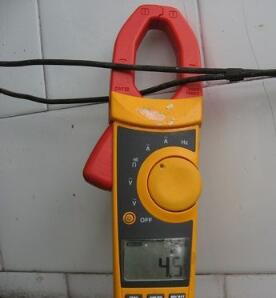
3. Open the clamp-type table jaws and correctly connect the clamp meter to the circuit under test. At this point, the actual current of the household appliance can be measured.
The access method shown in the figure below is correct. Only the single power cable of the circuit under test can pass through the jaws. Two wires can be tested separately. The measured values ​​should be equal in theory, otherwise the line is not normal. The leakage current is large. The measured current value of the test circuit shown in the figure is 4.5A.
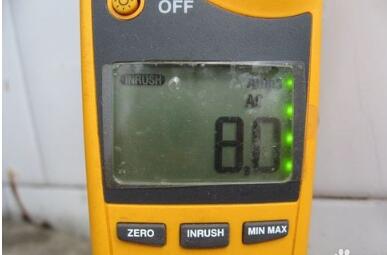
4. If you need to test the starting current of the household appliance, you should start the household appliance by pressing the “INRUSH†button on the basis of the previous step. The button process is as shown in the figure.
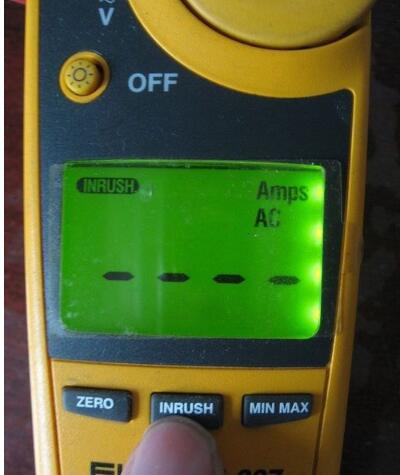
5. When the “INRUSH†button is pressed and the home appliance is still not activated, the meter displays as shown.
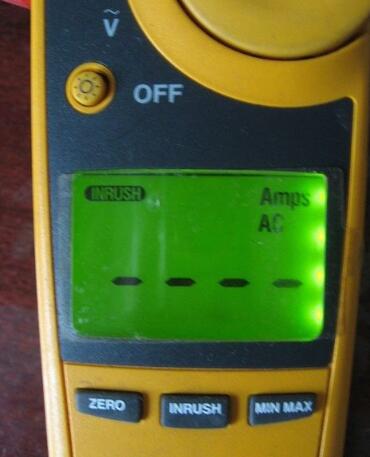
6. After starting the household appliance, the measured starting current is as shown below.
Precautions
The gear position of the clamp meter must be selected correctly. AC current should be selected. Choosing DC AC will make the measurement result wrong.
When measuring the starting current, be sure to press the 'INRUSH' button before starting the home appliance, and then start the home appliance reading. Otherwise the maximum starting current is not detected.
High Speed Edge Sealing Machine
High Speed Edge Sealing Machine,Woven Bag Small Sealing Machine,Household Woven Bag Sealing Machine,Fully Automatic Woven Bag Sealing Machine
Dongguan Yuantong Technology Co., Ltd. , https://www.ytbagmachine.com